Apple released a new macOS version almost at yearly base and it is super easy to upgrade to a new macOS version when the new OS is publicly available and your Mac meets the system requirements. Go to the Settings -> Software Update. The new install app will be automatically downloaded and you can start the in-place upgrade without losing any date.
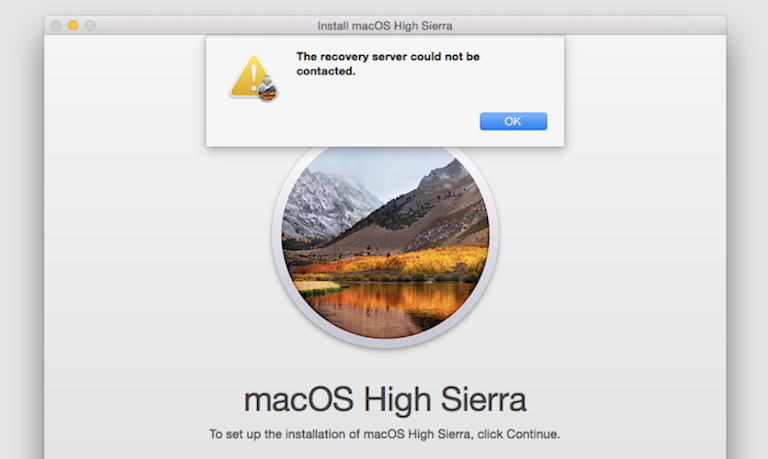
So the Mac users are more likely to upgrade a newer macOS version. However, downgrade is much painful when comparing to the upgrade process. And sometimes it is a time consuming and troublesome process. Simply put, you can not just download an old version of macOS Install app and start the downgrade, which is not permitted by Apple. The official way is to erase the hard drive and boot your Mac into Internet Recovery. Unfortunately, when I was trying to downgrade macOS Monterey to High Sierra from Internet Recovery, an error message pops up and says:
“The Recovery Server Could Not Be Contacted”
What is Internet Recovery on Mac?
Internet Recovery is the system repairing and troubleshooting environment available on all Intel based Macs. You can boot your Mac into Internet Recovery and reinstall macOS. This is a popular option for system downgrade when the new macOS does not work well on your Mac.
However, as its name implies, the target Mac should have an active Internet connection to start Internet Recovery. The Recovery app will fetch all necessary files from Apple update server. Once the download is finished, the reinstall process will get started. If the Internet connection was broken or something wrong with remote Apple Update server, the macOS reinstall would fail.
Issues with Internet Recovery for macOS High Sierra
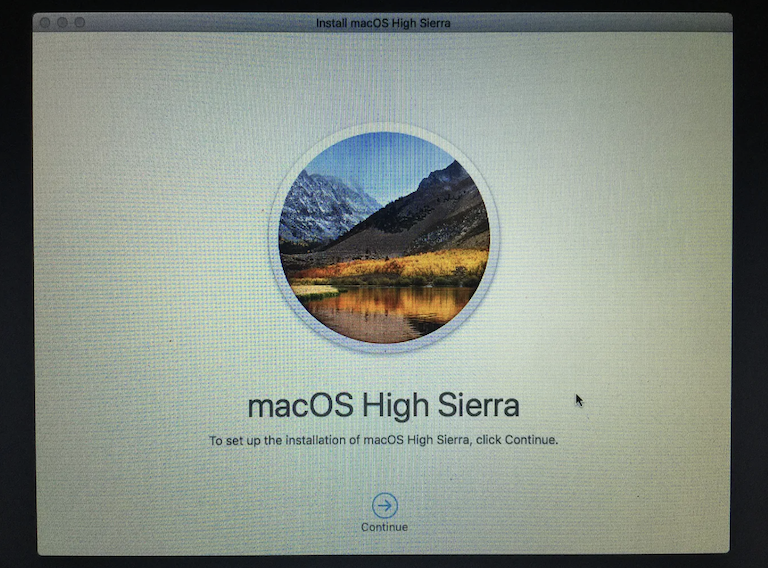
When you click the Continue button during High Sierra installation, you will see the “The Recovery Server Could Not Be Contacted” error message showing up at the top of Install macOS High Sierra app. This is because the remote url of software download from Apple server was not resolved. I found out there was a bug in Security.framework, which is responsible for communicating via SSL between the end-user Mac and Apple Server.
Please don’t worry! We will show you an effective way to downgrade macOS to High Sierra without the need of Internet Recovery.
Make Sure Your Mac is Compatible with High Sierra
Not all Macs are eligible to run High Sierra. This is especially true for Apple Silicon Macs. According to the Apple official documentation, only these Mac models are fully capable of installing macOS High Sierra, including:
- MacBook (Late 2009 or newer)
- MacBook Pro (Mid 2010 or newer)
- MacBook Air (Late 2010 or newer)
- Mac mini (Mid 2010 or newer)
- iMac (Late 2009 or newer)
- Mac Pro (Mid 2010 or newer)
In addition, you can’t install High Sierra on a Mac that is shipped with a higher version of macOS, such as Catalina, Big Sur, Monterey or Ventura.
How to Downgrade Your Mac to High Sierra without Internet Recovery
Besides the Internet Recovery, reinstalling macOS from a bootable USB drive is another working way to downgrade macOS to High Sierra. However, you have to prepare a bootable High Sierra USB in this case.
Step 1: Download macOS High Sierra DMG file from the following link.
https://archive.org/download/macOS.High.Sierra.10.13.6
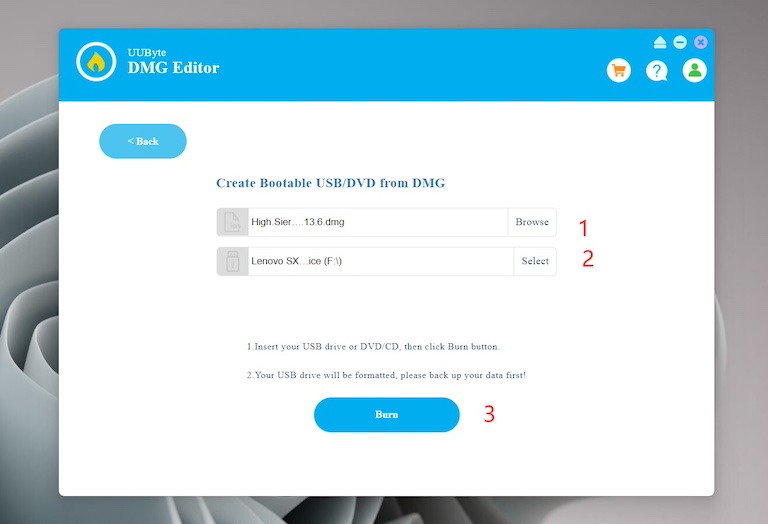
Step 2: Install UUByte DMG Editor on your PC or Mac. After that, connect a USB flash drive as well.
Step 3: Open DMG Editor and click the “Burn” button. Next, import the downloaded High Sierra dmg file and choose the USB drive.
Step 4: Click the “Burn” button to start writing dmg file to USB. Wait about 7 minutes and you will get a bootable High Sierra for installation.
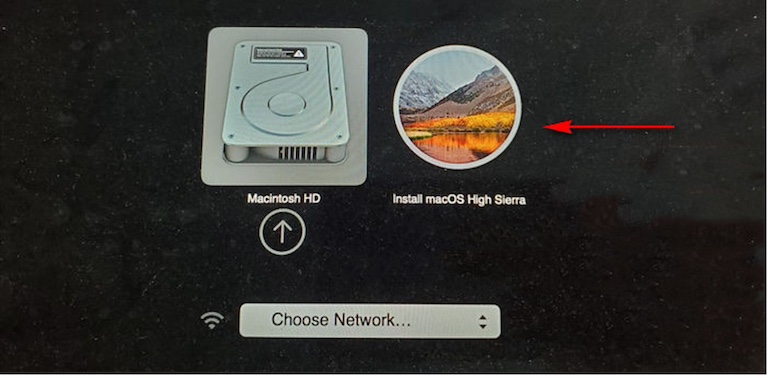
Step 5: Restart Your Mac and hold the Option button. This will open up the Start Manager. Now, click on the volume name that says Install macOS High Sierra. After that, follow the screen prompt to install macOS High Sierra on your Mac.
Note: For old Intel Mac users, you can download High Sierra Install app from Mac App Store and use the following command to create a High Sierra bootable USB on Mac:
sudo /Applications/Install\ macOS\ High\ Sierra.app/Contents/Resources/createinstallmedia –volume /Volumes/USBName
Apple Silicon Mac does not work as High Sierra app is too old to be running.
How to Fix ‘Install macOS High Sierra.app Damaged’ Error
Occasionally, you might come across the following error when trying to install macOS High Sierra app from USB.
“This copy of the install macOS high sierra application is damaged and can‘t be used to install macOS.”
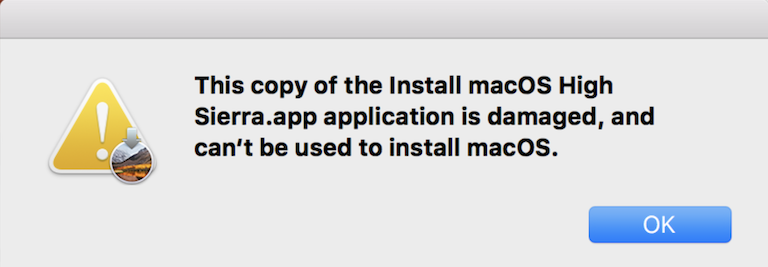
The reason for this error is that the certificate of High Sierra Install app was expired on October 2019. To avoid the illegal modification of macOS install app, each macOS install app come with a security SSL certificate that have a begging and ending data. You have to change the system date to fix this issue.
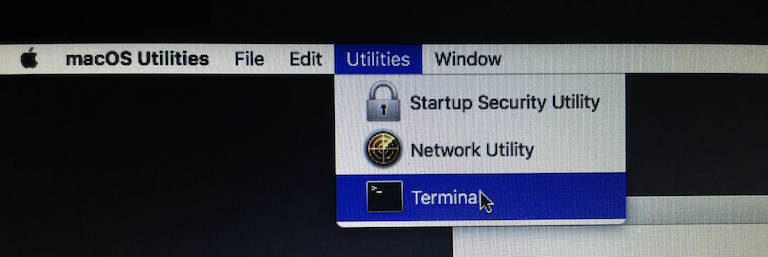
Simply boot your Mac from USB and choose the Terminal from the Utilities menu bar. Now, enter the following command to change the system date in the range of SSL certificate for the Install macOS High Sierra app:
date 121401582018
This formatting stands for [mm][dd]HH]MM[yy].
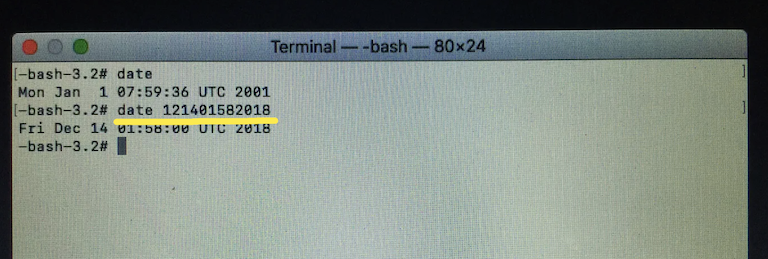
After that, quite the Terminal app and start downgrading to macOS High Sierra.
Conclusion
Downgrading macOS to High Sierra has been a challenigng task since the SSL issue from Apple Server. Currently, Apple does not offer any solution to fix the issue. You have to clean install High Sierra from a bootable USB drive. Please back up your important first before downgrade as this will erase the hard drive. Be warned!