A bootable USB is a handy tool we can’t live without in our digital life. It is a very helpful solution when you need to reinstall OS, repair or troubleshoot the computer. Some of us might have a large collection of tools or build a custom USB driver for special purposes. In such a case, it is very important to have a backup copy of the USB drive, which is small in size and could be easily forgotten or got lost.
In this tutorial, I am going to show you how to create a new ISO from a Windows 11 bootable USB. It is a dedicated USB drive that can be used to bypass Windows 11 system requirements. This means you can install Windows 11 on an unsupported hardware (Unsupported CPUs or device without Secure Boot or TPM 2.0 chip.)
After creating a new bootable ISO from this special USB drive, I can share the customized ISO with my friends or family numbers so they can build the bootable USB by their own in order to install Windows 11 on unsupported devices. Otherwise, they could ask me to do that or send the USB to them. For me, it saves time and money.
Step 1: Plug in the Bootable USB into a Windows PC
Please insert a USB flash drive into the PC. Make sure the USB drive is shown in Windows file explorer. It is also recommended using a fast USB 3.0 or above flash drive instead with at least 8GB free storage.
Step 2: Download and Install ImgBurn on PC
ImgBurn is a very popular free program for burning disk image to CD or DVD disc. Besides this core function, it is also capable of writing files/folders to disc, creating image file from disc and creating image file from files and folders. We will use the later function to create a new ISO image from Windows 11 bootable disk.
Please download ImgBurn from here: www.imgburn.com/index.php?act=download
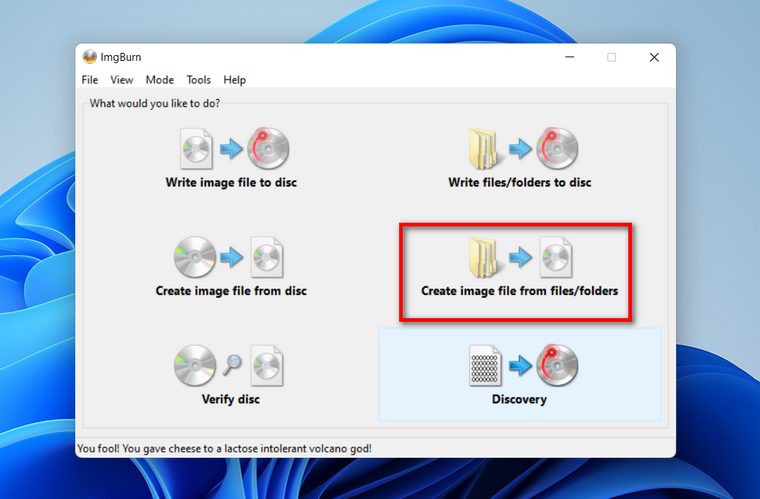
Step 3: Open ImgBurn and Choose “Create image file from files/folders”
When you launch the ImgBurn program from desktop shortcut, you will see six menus at the home screen. For creating a new ISO from USB, please select “Create image file from files /folder” option to proceed.
Step 4: Add Source Drive and Set a New Name for ISO Image
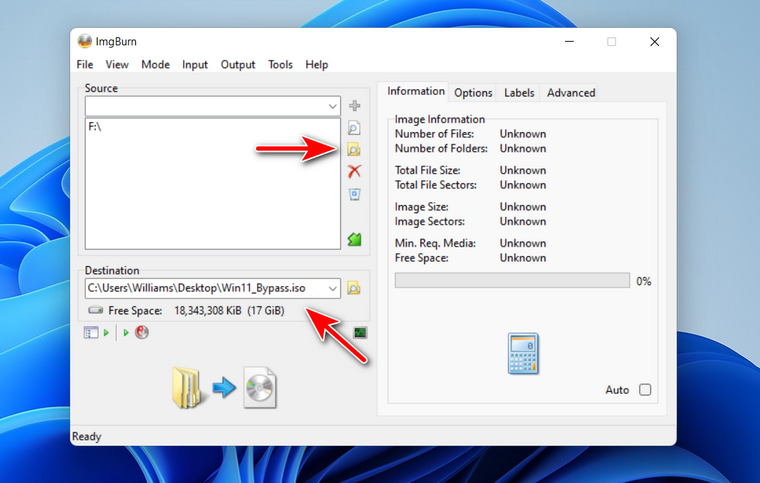
From the new Window, click the folder icon at the middle to add the root folder of USB drive. This will add all files and folders of USB drive to newly created ISO image. In my case, the USB drive is F:\. After that, click the folder icon at the right side of the Destination menu and set a new name for ISO image file.
Step 5: Edit the Bootable Disk Settings
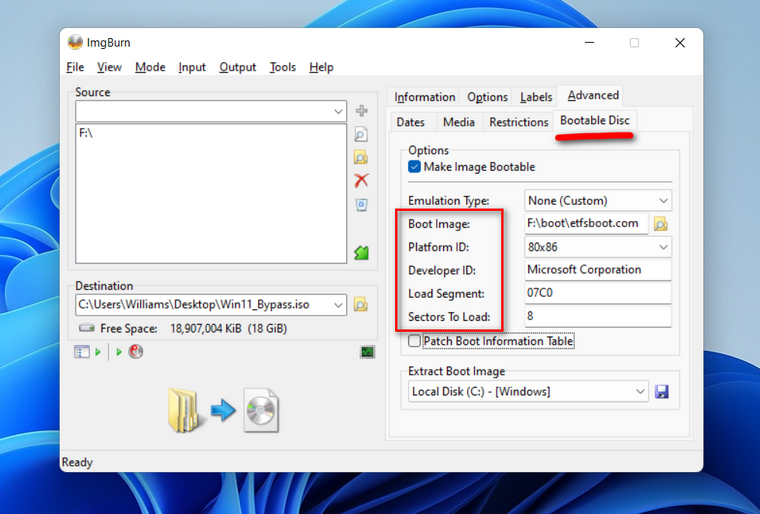
To make the new ISO image bootable, you have to adjust a few settings. Now, go to the Advanced -> Bootable Disc.
First, make the Make Image Bootable option.
Next, click the folder icon at the right side of the Boot Image and add the etfsboot.com, which is located at the boot folder of USB drive.
Then set the Developer ID to Microsoft Corporation and Sectors To Load to 8.
Step 6: Start Creating ISO from Windows 11 Bootable USB
When all the settings are finished as suggested, please click the Folder to Disc icon at the bottom of left side to start creating a new bootable ISO from USB drive.
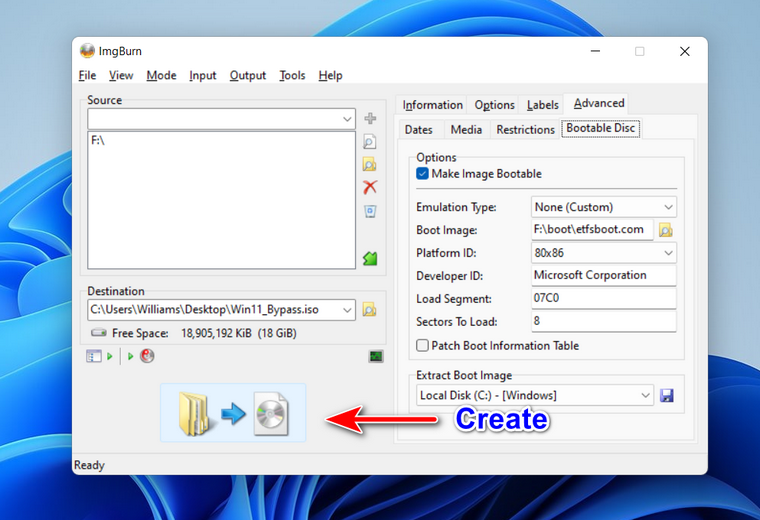
Wait a few seconds, and you will be asked to change the ISO type for a bootable ISO image. Please click Yes to continue. 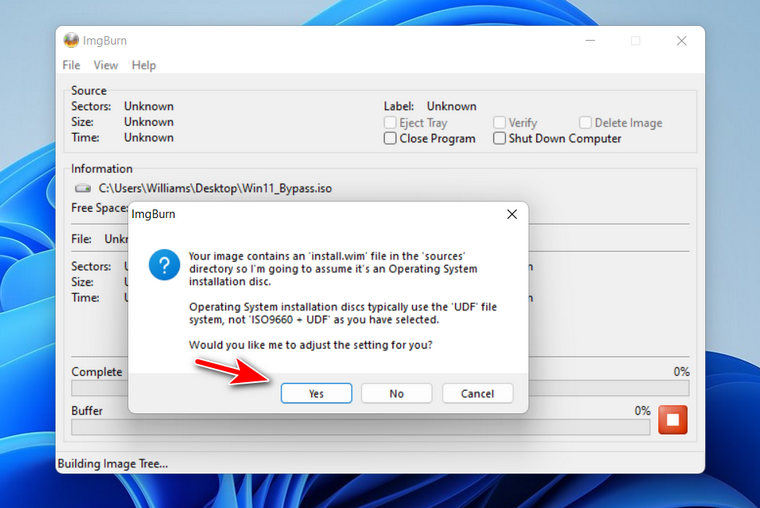
Now, ImgBurn starts to create a new bootable ISO from USB drive. It takes a few minutes to be done. There is a message prompted up when it is done successfully.
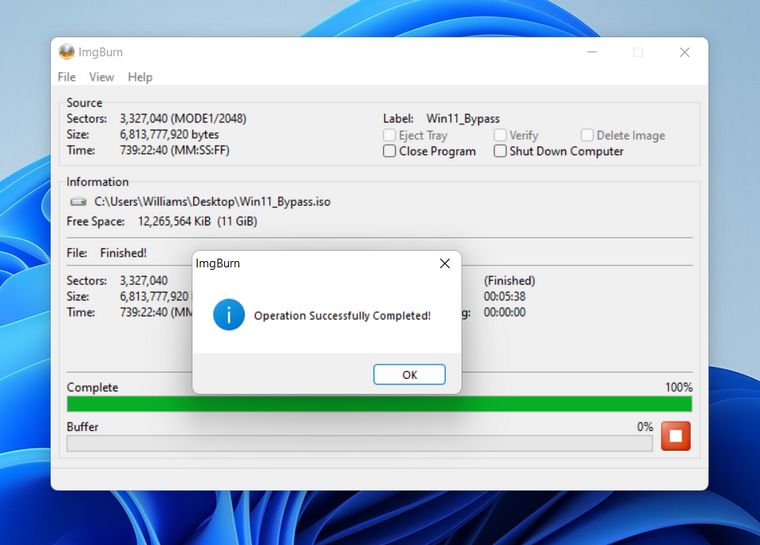
Step 7: Verify the Bootable ISO Image
Double click the ISO image on Windows 11 or Windows 10. It is mounted successfully, it means the image is complete not damaged or broken. Next, you need to burn the ISO to USB to check if the ISO is bootable or not. Upon success, you will see the bootable USB from Quick Boot menu.
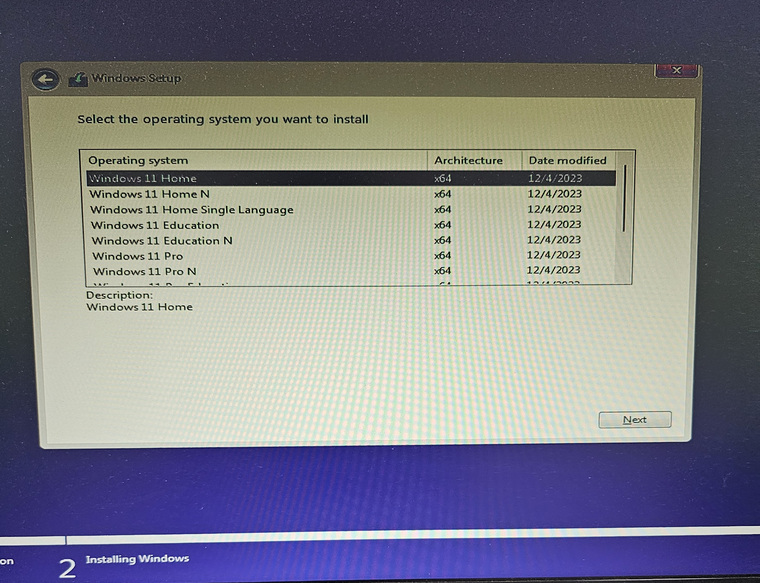
This is the latest guide for creating a new bootable ISO image from a Windows bootable USB drive. It is a complicated process and you should follow all the steps carefully, especially the settings part of Boot Disk section. In addition, the following software turn out not the ideal tool for creating ISO from bootable USB, including AnyBurn, Rufus, ImageUSB. Please don’t waste time on them!